I have been intrigued as to how UV (ultra-violet) fluorescence works, so have been doing some research on the internet to find out. Before I attempt to explain the science, there will be some general information and pretty pictures.First of all, what items fluoresce? You already know about lichens, but there are some common but unexpected things that give results under UV light. Here's one - eggs!
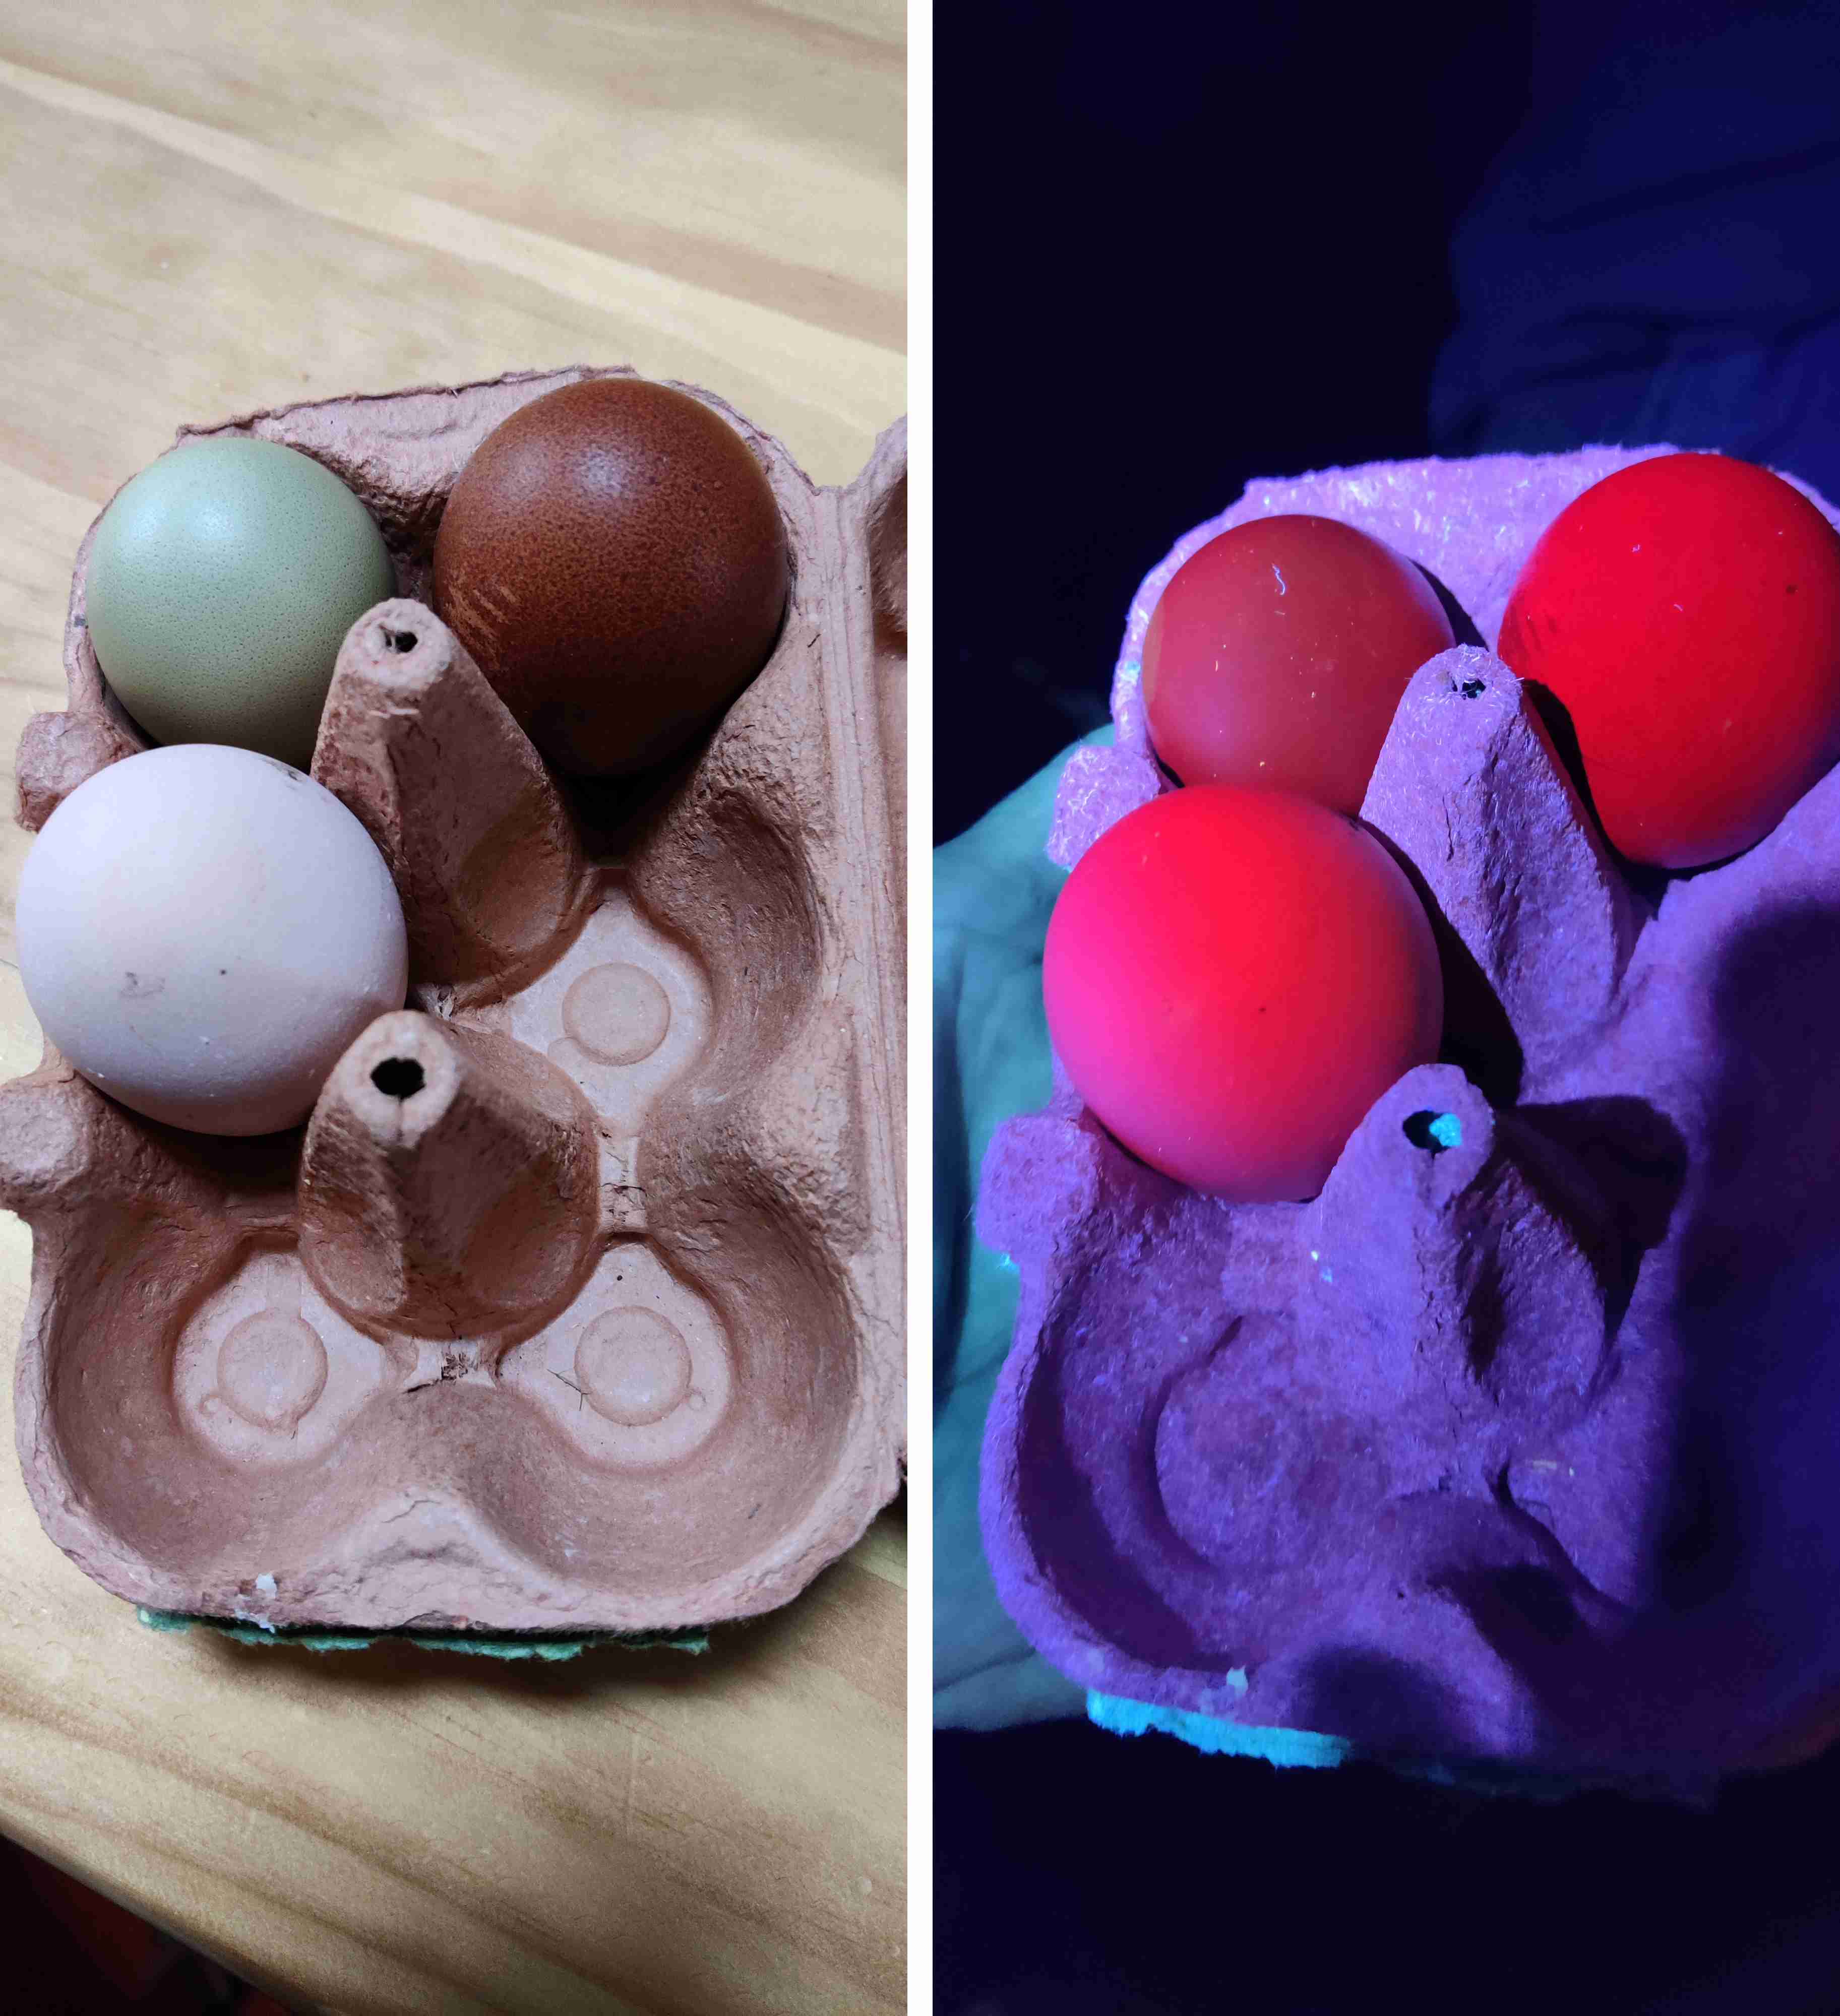 |
| Eggs: left normal light, right UV light |
The chemical in eggs shells that fluoresces is called PPIX ( Protoporphyrin IX) which gives eggs their brown colour. You can see that the bluer egg in the box is not quite as fluorescent. There is a lot of information about fluorescence in eggs here and the diagram explaining the science is further down in this post.
The other commonly occurring chemical that fluoresces is chlorophyll, the green compound found in plants that allows them to photosynthesise (create food from sunlight, carbon dioxide and water). I now think this is the source of the unexplained bright red fluorescence in the previous post, shown again below, which was probably algae.
 |
| That stick again! |
You may wonder why the glow is a red colour when plants look green. In fact, plants absorb the red wavelengths and reflect the green light (which is why they look green). When I was cleaning my greenhouse this week, I did wonder why they make greenhouse shading green - it would be better to make it red as the plants want the red light not the green!
The explanation for the colours under UV involves some science so stop here if you are not curious...
Every atom or molecule has electrons surrounding it. Each electron has a certain energy, called its energy level. However, it can absorb energy and become "excited" and jump up to another energy level. It can't just be any amount of energy though. It needs to be a precise amount to lift it to the next energy level. Imagine a set of stairs. To get to the next higher step, you have to step up the precise amount.
UV light has a lot of energy and causes the electron to jump up more than one step. When it then falls down the steps, it gives out the energy as heat or for its final step down the energy is given out as light - fluorescence. The colour depends on the height of the last step down. Different chemicals have different energy levels (step heights) so fluoresce a colour specific to that chemical.
Here is a diagram showing the process for eggs which is from here

A similar diagram for chlorophyll in plants is called the Jablonski diagram - google it if you want to know more. Basically, the last step down is the amount of energy in a red photon, so there is red fluorescence.
As lichens produce many different chemicals as part of their defence against sunlight, predators (slugs and snails) and other lichens encroaching their space, different lichens can glow different colours under UV. Here is one on a rock by Pattack Falls that glows a beautiful bright blue:
 |
| Sphaerophorus globosus: normal light on left, UV on right |
Technical note. The UV torch used had a wavelength of 365nm.


.jpg)
.jpg)